Showing posts with label Card. Show all posts

Sunday, 25 May 2014

Quick Card

Hi Everyone....................hope you are all well and a huge welcome to my new followers x Its Great to have you on board here at Curious n Crafty Treasures.
Just a quick post from me today as the kids are coming over for dinner so I must head off and get cooking !!

The card below was made using the  gorgeous Madame Payraud Papers by Papermania, which my lovely crafty friend Astrid  introduced to mammy and I in April.

One sheet of the paper, cut two strips then edge with Distress Ink in Vintage Photo. The middle section was matted on to some brown card. A piece of lace from my stash was adhered on to the matted card, then I added  a sentiment from Tim Holtz Stampers Anonymous  Simple Sayings Stamp Set. ( a really useful set)

A small flower, and a Madame Payraud Butterfly, a speckled stamp and some DI on the edge of the card and we are done........well except for the insert, which I like to personalise where possible. There are also some delightful card verses available on the internet, which you can copy and then print.

Enjoy the rest of your Sunday and I will be back on Tuesday with my Craft Room Challenge Project. xx
post signature

Saturday, 12 October 2013

Cabinet Card/album

Morning everyone .....................thank you for visiting here at my little corner of blogland and a huge welcome to new followers. I am so thrilled that you have joined me here x

Today I am sharing a Cabinet Card that I made in September for a colleague at work. She wanted two cards for family who have similar interests.

The dies are from Sizzix and I used various TH papers and stamps from my stash.


Have a great weekend whatever you are up to x

Best Wishes and Crafty Hugs xx
post signature

Sunday, 29 September 2013

Venetian Album

Hi Everyone............thanks for dropping in today. Below I am sharing an album that I have made using a combination of Digital Stamps and Rubber Stamps as well as stitching.

DH and I hope to visit Venice  next year and I plan to keep memories/tickets etc  from the trip within it. I have still to work on the inside but so far I love the front cover.

The Digital Images are from Nicecrane Designs and are called Venetian Paintings CS1. After resizing I matted them on to some brown card, which was distressed around the edges to fit in with this vintage style.
The rubber stamps are from  the Venezia set by  Oxford Impressions.  You can view the mask in the centre of the album and I have stamped on several pieces of fabric using Ranger Archival Ink. 

Some hand dyed cotton was stitched on to the whole of the outside cover. I used an embossed piece of card, aged with vintage photo DI. It was then stitched on to card, along with some gorgeous pieces of lace. 
I also stitched on some lovely lace as ties. The edges of the album were torn and distressed using a combination of scissors and my paper distresser then inked with Walnut stain for more ageing.
I like the idea of the threads hanging loosely around the bottom too.....very shabby ! 


A close up of the beautiful digital images


Another view of the front album cover, which had lots of metal embellishments applied


Nicecrane Designs can be viewed by clicking the link HERE


Oxford Impressions can be viewed by clicking the link HERE and as far as I am aware they can be purchased from That's Crafty and The Craft Barn in the UK

Have a wonderful day whatever you are up to and Thank You so much for visiting. 

Crafty Hugs xx
post signature


Friday, 5 July 2013

Bloomin' Lovely

Well its hard to believe its Friday once more..........and hey what a Friday !!!!  Andy Murray is playing in the semi-final at Wimbledon today and I just cant wait !!!!!!  Up early to get organised so that my tasks are complete and I can sit and relax.............................enjoy!!!!!!

Below is a card that I made for my mum and dad's Wedding Anniversary............the colours have not shown up to well as it is a very bright, colourful project. ( need to improve my photo skills)

Distress Inks were blended and then flicked with water to distress the background and the edges were torn with TH paper distresser. I then stamped various images using the JOFY stamps, set 11, from Paper Artsy. This is the first time I have used these stamps and they are so versatile, in that you choose your own layout/design.

Over at Country View Crafts the challenge is Summer Sizzler, where I am entering this piece. Click HERE if you would like to join in the fun


The florals were coloured with various Distress Inks and Promarkers, keeping it sunny and bright.

To add further detail and depth I adhered some torn  book pages. 


Hoping to catch up with you all over the weekend and whatever you are doing.......................Have A Good One xxxx
post signature

Thursday, 25 April 2013

Sentimental Birthday Wishes x

Hi Everyone.... thank you so much for dropping in to my little curious n crafty corner of blogland.

I must apologise for my absence....but I have a rather demanding job which occasionally prevents me from visiting you, never mind posting. Think I am back on track now and I look forward to catching up with you all.

Below is a card that I made for my son to give to his cousin on her 21st Birthday.  (I made her a canvas with a key, which you can view in the previous post )

I just can't believe that my niece is now 21..........time just  passes so quickly !!! ( okay...... I  guess it makes me realise I am older too !!

The  Steampunk stamp set, which comprises of the body form, butterfly and bee  are designed by Sam Poole from Creative Studio's. I so love Sam's designs as they are right up my street.  (  After cutting the stamped images out I blended the body form and stamps with a combination of Vintage Photo, Walnut Stain and Salty Ocean DI's) I like to ensure that there are no white edges on my projects and always edge with ink or a marker, charcoal pencil as it gives a better finish.

I used a Spellbinders die, edged with DI in Vintage photo and the  TH Sizzix Bigz die, ( Weathered Clock), which I blended with a combination of walnut stain and salty ocean.

The numbers were cut using  the TH Wordpad die from Sizzix.


The winged Steampunk  bodice, butterfly and bee are all raised off the paper to give a lovely  effect.

Certainly a sentimental keepsake that my niece will treasure. 

Its been some time since I played along with Fashionable Stamping Challenges but this make meets the current fortnightly challenge of 'Sentimental'. You can play along by clicking HERE

At Simon Says Stamp and Show the challenge this week is Colour. Please click HERE to play along with me :0

Thank you so much for visiting and for leaving comments.  I love to read them  and be assured that they are really appreciated.  Catch up later this evening  and definitely over the weekend when I will have time to play.....Yippee

Crafty Hugs


post signature

Thursday, 24 January 2013

Sew Distressed !!!!

Hi Everyone................thanks for continuing to follow me. I am so looking forward to the weekend and some crafty time...........all nice and cosy in my little craft room.

Over at Simon Says Stamp and Show the challenge is What are you known for ?  I would say that I am known for my 'distress and collage' pieces. I love to create various backgrounds with Distress Inks 
( particularly Vintage Photo ) and then piece together various stamps and embellishments from my stash. My style can also be a bit quirky at times :-)

Below is such a piece............made for a colleague who had a special birthday and had recently purchased a sewing machine. 


The card is an 8 by 8.........but not an easel one !!!!. The background was inked with Vintage Photo and Stormy Sky Distress Inks, then stamped with various stamps from Tim Holtz Stampers Anonymous Haberdashery Set  (CMS 105) in Archival Ink.

The corrugated card was also inked with DI's and adhered with Ranger Wonder Tape.


The sewing machine above is one of Wendy Vecchi's Blossom Bucket Embellishments.


The inch tape is from my stash and one that I cut up it was also adhered with Wonder Tape. 

I halved the bobbin or spool so it would lie flat on the card, inked it with some DI's to age it. Some of Tim's stamped images were then matted on to card.


Having stamped the tailor's dummy I cut it in half and adhered some vintage lace and some pearls, as well as a dragonfly from my stash. Some Buttons were added to the corner.


I am also entering this piece in the following challenges:


Hope you are all keeping warm and getting very inky


Hugs


post signature

Monday, 14 January 2013

Mask It

Hello Everyone...............a huge welcome to followers old and new x

Today I am sharing another 8 by 8 easel card using the masking technique.  I really enjoy this technique and I used  a combination of Tim Holtz Visual Artistry  Collection and  his Components Collection Stamps.

There are various ways of doing the masking technique........i.e you can restamp the image on paper, cut it out and place over the main stamped image.............there is also a masking fluid that you can apply over the stamped image and then remove, or as I have done on this one...cover the stamped images with torn paper. 


Once images were stamped  in Archival Ink ( Sepia) I inked them with various shades of Distress Inks......................my favourite Vintage Photo and Blue China.


I added a few embellishments  placing glossy accents inside the framed piece.


Thank You so much for taking the time to drop in and maybe even leave a comment.....it means so much as I know you are all very busy.

Take Care x


post signature

Sunday, 2 December 2012

Dreaming of Paris

Hello everyone its been a very cold weekend here but so far no snow, though I believe there was some snow lying in East Lothian on Friday.

Can I just say a huge thanks to followers old and new who visit my blog  regularly and leave lovely comments. They are truly appreciated as I know it is a busy time for everyone.

Below is a birthday card  I recently made. The stamp is from Inkylicious, unfortunately I don't know whose background paper I have used as they were purchased in a pack that I must have discarded. I have certainly had them for some time !!. The flowers are Prima and were again purchased many years ago, so its great to use them. They are all white and I have inked them with vintage photo and tumbled glass DI's.
I used a flourish stamp inked with Archival Sepia on the actual card, which is 7" by 7". The same flourish was used on the background paper. Here I used Versamark and copper embossing powder, which was heat set. I used TH distressing tool on the edges then aged with vintage photo DI.


The edges of the main image were torn and inked with tumbled glass over vintage photo. The eyes and mouth were inked with  TH Distress Markers.

Best wishes was inked with DI then spritzed with water as you can see below. 

When piecing together I matted the background paper on to some light brown card and swiped some DI along the edges to give an aged look. 

I am entering this project in the following challenges


Lots of crafting to do over the next few weeks as I am not organised at all..... but I always get there. My craft room is an absolute disaster, however, this year I can close the door instead of using the dining table and the cats wont get covered in glitter like they normally do.

Take care and keep warm.   Catch up soon x
post signature

Saturday, 10 November 2012

Francaise with a Twist !!

Hi Everyone............. welcome to followers old and new. I had some crafty time today and boy did I have fun!! 
 I made this card specifically for Simon Says Stamp and Show Challenge- Inspiration Francaise, where I love to play. 

This is an Easel Twist Card and a first  attempt for me.

  I used hammered card, which is 8" by 8". The main stamped image is from Inkylicious, which I stamped in Black Archival Ink and matted on black card, the die cuts around the edge are TH Sizzix Distressed Doily.
 I used a Spellbinder Die and folded it in half, stamping french script from Hero Arts then adding 'Bonjour'. Some black soot Di was blended around the edges and and Eiffel Tower charm was attached. The letters used were all diecut from TH Sizzix Carnivale. The lace at bottom of the card was diecut from TH  Sizzix Vintage Lace.
I did not have black ribbon so used Black soot DI to dye some  cream vintage ribbon. I then sewed on a button from my stash and added some hat pins. A few self adhesive Pearls were also added to the top right corner.


The bottom of the card was stamped with the same Hero Arts French Script and some TH Sizzix Elegant Flourishes were die cut and adhered with Cosmic Shimmer Glue. Once again the letters in 'Mon Amie' were die cut from TH Sizzix Carnivale.

All of the lace trims were adhered with Ranger Wonder Tape


 As always 'Thank You' so much for visiting.   

Crafty Hugs
post signature

Tuesday, 9 October 2012

Special Sentiments for a Special Person


Hi everyone and a special welcome to my new followers too. I have managed to keep up with your blogs over the last week but have not had a chance to post as I have been trying to crochet a baby blanket..........which keeps turning out like a large hat !!!! I think I have taken it apart at least 12 times :( The stitches are brilliant of course :) but the shape just is not right.....but I shall persevere :)

Below is a card I made for a Special person using grungeboard, a TH  mask and distress ink in rusty hinge. I scored the grungeboard with my scor it all ensuring that part of it bent back and would sit properly on the shelf. I also used some of Tim's classic stamps and sentiments, then embellished with some pieces from my stash.


Its so weird how the colours look so different in the photograph yet I used the same distress ink. 


Hope to catch up with you tomorrow over at Julia Dunnit's Stamping Ground when we take part in WOYWW.


See you then
post signature

Thursday, 27 September 2012

Vintage Collage

Hello everyone....sorry i have not been around much this last 10 days. Work and life have been a priority but I am back and hopefully so is my Mojo !!

I have  made this vintage collage card for someone special....kinda running late but I know it will be appreciated.

Background was a paper from my stash on which I blended DI's and matted on to navy card. The lace is from Crafty Individuals and was adhered with Ranger wonder tape. The stamps used are a mixture of Oxford Impressions (April in Paris), which I love, and  TH Stampers Anonymous Classic Favourites ( SC008) and one from my stash. A small die cut was adhered with foam pads and a flower adhered with glossy accents.

I used foam pads on two of the stamped image to add dimension to the collage piece. A small piece of fabric and a butterfly finish this off.

 Having looked again at this photograph  I  think I shall add a pearl to the butterfly to finish.

I am entering this project in the 'Anything Goes' challenges over at Simon Says Stamp Challenge and the  Stamp and Create Challenge. You should have a look at the inspirational makes by the Design Teams and even join in.


Hope to catch up with you all over the weekend x

Crafty hugs

post signature

Thursday, 9 August 2012

Age before Beauty !!

Hi everyone................hope you are all enjoying the Olympics x
 How I wish I had an athletes determination and stamina. 

Just a quick post as life continues to be quite hectic at the moment............but I must not complain x

This is a card I made for my brother-in-law's birthday. As you can see I  stamped a time piece on the background and then sprayed with  some Dylusions inks. I also attempted some journalling doodles but they are hard to see on the dark card. The brick coloured card is from Tim's Co'ordinations cardstock and after embossing with one of his Sizzix dies I sanded it down and inked with stormy sky DI, to make it pop.

A few embellishments and some printed words finished it off. 

I am entering this card in the following challenges:


As always thank you for taking the time to visit....it is truly appreciated.

Crafty Hugs

Annie xx


Thursday, 2 August 2012

Bee Happy !!

Hi Everyone......................Just a quick post tonight as I am running around like a headless chicken....again !!  ( Hence the post title !!....nothing to do with the card below x)

This was a quick card I made for a friend's birthday. Various brown Distress Inks were blended on the main card then flicked with water/dried with a heat gun as per Tim Holtz technique. I then stamped the car from WV Studio 490's European Art in sepia Archival ink, colouring with a water colour  dipped in Distress inks.

I used the same blend and flick technique on the torn paper on bottom of card, overstamping with a large rubber stamp from Hero Arts. The letters were cut using Tim Holtz Sizzix Die and blended with Spiced Marmalade and Broken China Distress Inks.


I hope to catch up with you all over the weekend and look forward to viewing your creations.

Take care and 'Thank You' for dropping in, it means so much.

                                                                    Crafty hugs

                                                                      Annie xx


Thursday, 26 July 2012

Double Celebration !!


Hello everyone.............exciting day ahead  tomorrow in UK when the Olympic Opening Ceremony takes place. Jennie, The Artistic Stamper, has some fabulous piccies on her blog as she attended the rehearsal for tomorrow's ceremony. I have only observed what has been shown on TV but it really does look amazing !!!!

Best Wishes to all the competing athletes x

Today's post is of two cards I made for my friend's twin boys 30th birthday celebrations. Just realised I forgot to take a photograph of the back of their cards, which also included stamping, mainly large stamps, depicting Happy, Giggle and Dreams and sentiments !!! Silly me !!

The design is similar to that posted last week for my dad's birthday, using the Donna Salazar pocket die to house a tag. Again I used a TH Distressable paper for their initials. The letters were matted on to cardboard, distressed at the edges and then  totally covered in embossing ink and clear embossing powder, which I heat set to give a protected surface. The honeycomb stamp from Stampers Anonymous Tim Holtz ( TH) was used as a background on the front/insides of the card. TH DI's were blended on all areas of the card, mainly vintage photo, rusty hinge and spiced marmalade. 
Envelopes were made as the cards were not of a standard size, using Basic Grey, scrapbook designer papers from my stash. 

They were both delighted with their handmade cards, which as you know makes it all worthwhile.

As always I love to visit your blogs and view the fabulous crafty makes you have created. If you drop by please leave me a message and I shall do my best to reply. 

Crafty Hugs

Annie x


Monday, 23 July 2012

'Practical' Perella Card

Hi Crafty Friends...........hope you all had a lovely weekend. The weather in the West of Scotland has not improved much, however, I am glad that  many of you are seeing more sunshine. As usual the weekend passed much to quickly and its back to work before we know it x

The card below was made for a close friends birthday. I used stamps by Lynne Perella for Paper Artsy.  Given the dimensions of the long stamp I decided to create a bookmark as part of her gift. The background of the card was blended with various DI's, namely vintage photo and rusty hinge.  I then stamped  over the background using a flourish stamp/clear embossing ink. Gold embossing powder was added and heat set, creating further dimension. The stamps were cut out and  blended with DI's. I then used a Ranger TH watercolour brush to colour the stamped images with diluted DI and love the intensity of the water colour. On the bookmark I blended embossing ink and clear embossing powder over all areas before using my heat gun to set it. ( this made the book mark a bit more resilient to wear and tear )  The bookmark was attached to the card using a small  velcro  dot, enabling it to be removed as required.  Ribbon was added to the bookmark and a  wire embellishment was added  across the smaller stamped image.

Over at the Sunday Stampers Challenge the theme this week  is 'More than Words'. This piece certainly fits the bill as there is a word, but also my friend has a lovely bookmark to use and  treasure.


A huge 'Thank You' for visiting my blog and leaving such kind comments. As always, I shall return the compliment.

Crafty Hugs  Annie x


Thursday, 19 July 2012

Steampunk Mix

Hi Everyone..........a huge 'Thank You' to followers old and new. Its lovely to read comments you leave and inspires me when I return the compliment and view your own fabulous creations.

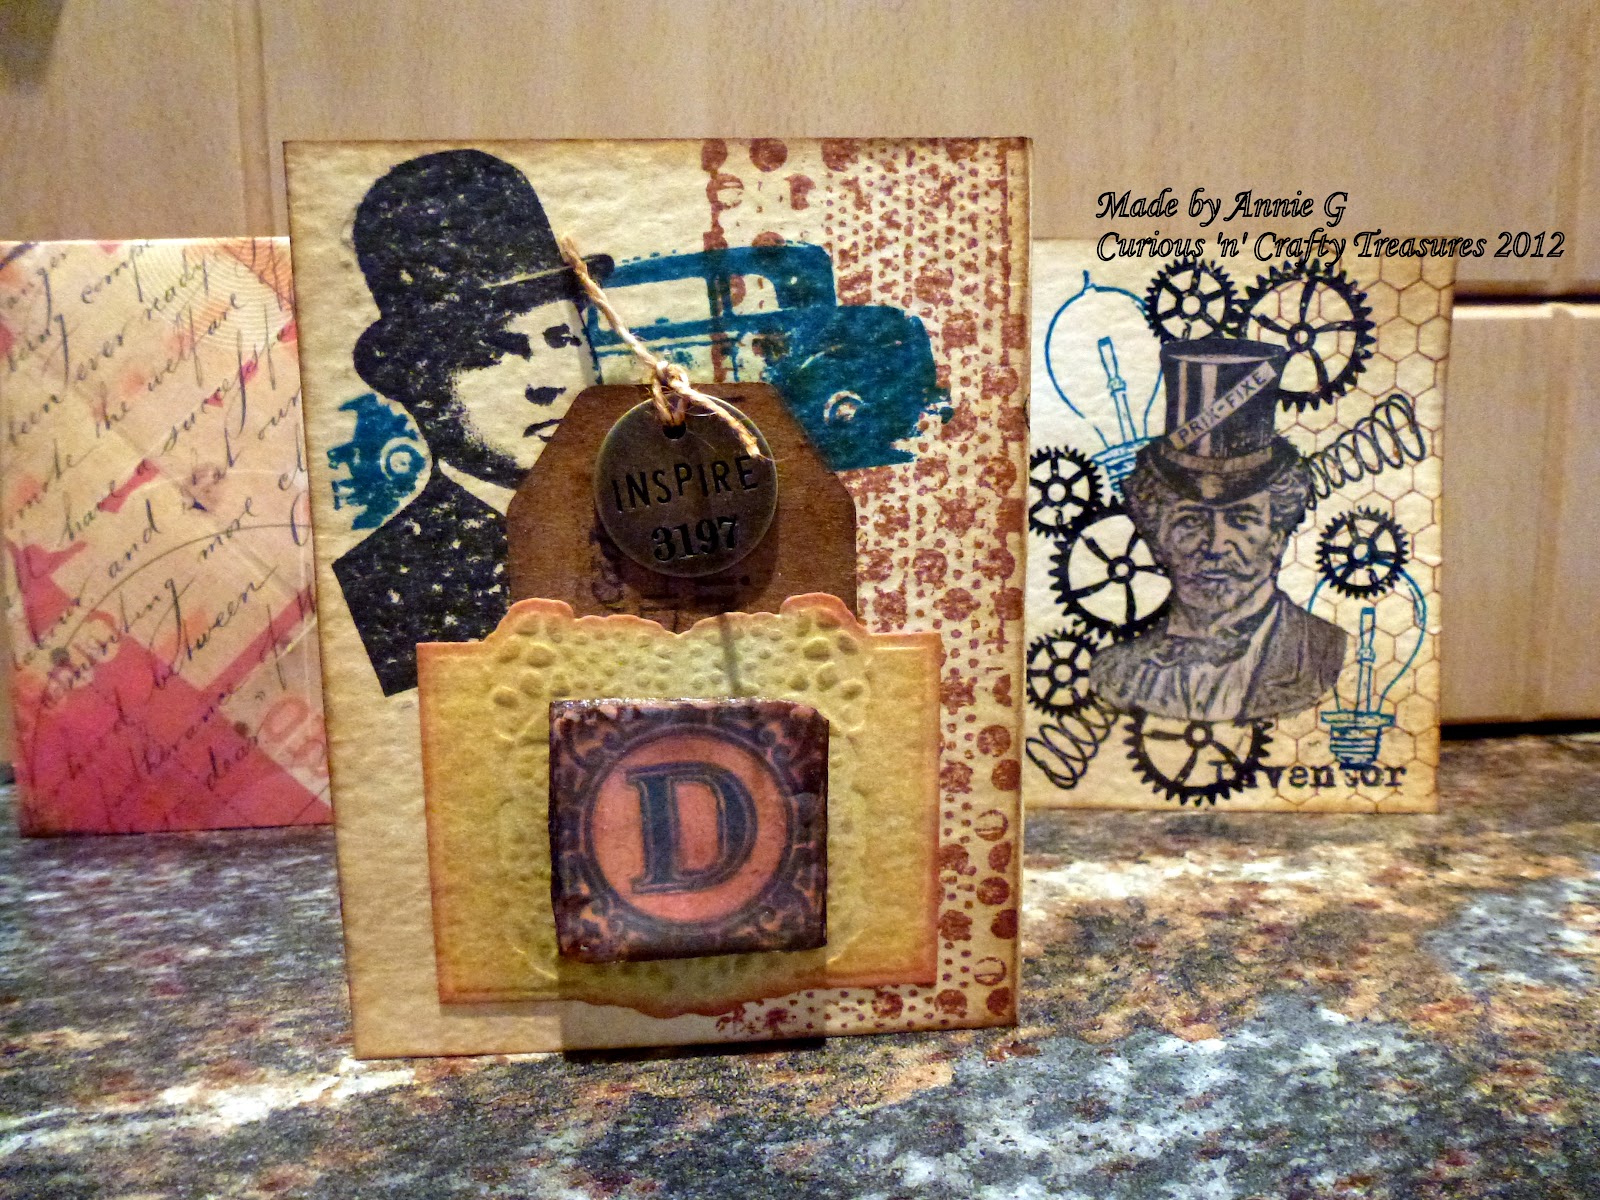
Below is a card that I made for my Dad's recent birthday. First of all I stamped the card using Stampers Anonymous TH Mixed Media stamps, which I love. I then blended the card with various brown DI's. The pocket to hold the tag was  die cut from Spellbinders Donna Salazar's Creative Book Pages 2, which was blended with more brown DI's and edged with Rusty Hinge. Having found Tim Holtz Distressables Book I cut out the letter D from one of the Distressable Papers, adhering it to cardboard. Once dry I blended it with DI's then covered in embossing ink/clear embossing powder. ( I  clear embossed as I did not have any of the memory glass that Tim uses in the book )  On the front page I used two of Wendy Vecchi's stamps from the European Art range using the masking technique.   I also used the masking technique on the last page you can see, using various stamps from Sam Poole of Creative Studio's Vintage Inventor Set.

The tag was stamped and blended with DI's too and an Idea-ology tag attached. The envelope was made from  some Basic Grey papers  I have in my stash.

I am entering this card in the following challenges:


Thank you for dropping in......hope to see you again soon.

Crafty Hugs

Annie x