Showing posts with label Steampunk. Show all posts

Thursday, 25 April 2013

Sentimental Birthday Wishes x

Hi Everyone.... thank you so much for dropping in to my little curious n crafty corner of blogland.

I must apologise for my absence....but I have a rather demanding job which occasionally prevents me from visiting you, never mind posting. Think I am back on track now and I look forward to catching up with you all.

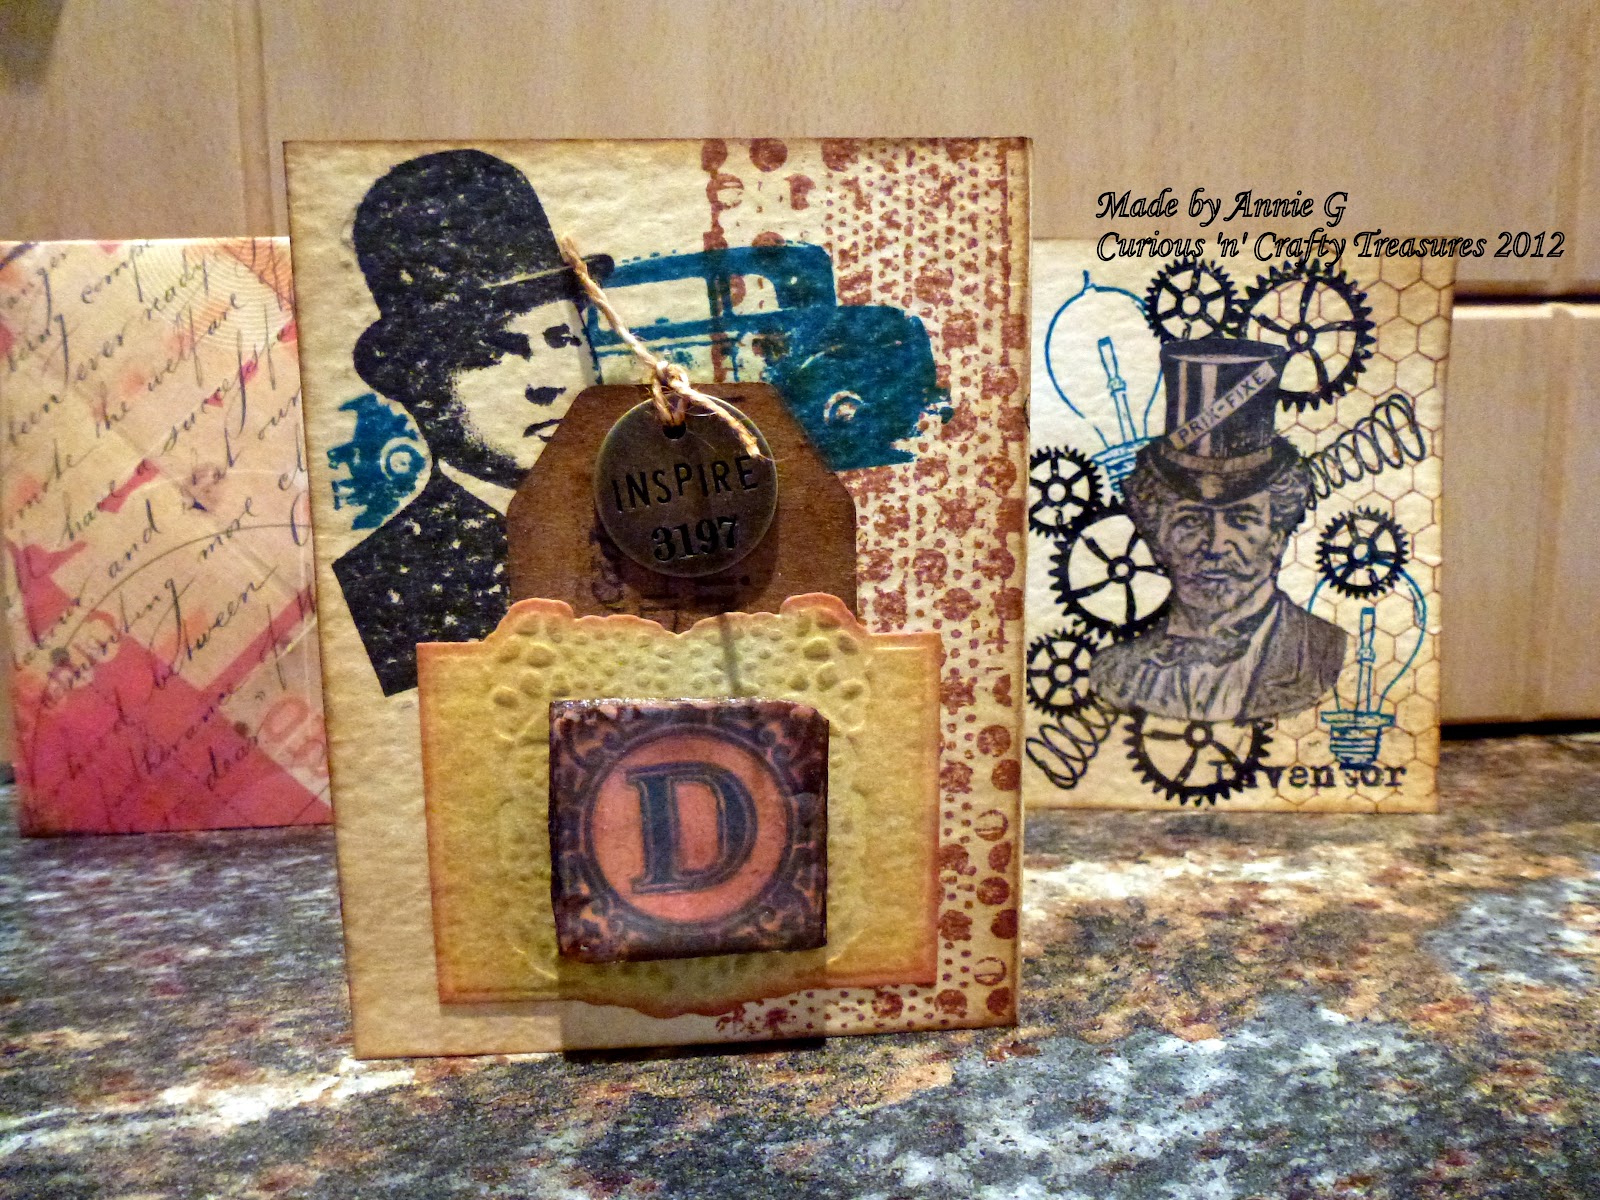
Below is a card that I made for my son to give to his cousin on her 21st Birthday.  (I made her a canvas with a key, which you can view in the previous post )

I just can't believe that my niece is now 21..........time just  passes so quickly !!! ( okay...... I  guess it makes me realise I am older too !!

The  Steampunk stamp set, which comprises of the body form, butterfly and bee  are designed by Sam Poole from Creative Studio's. I so love Sam's designs as they are right up my street.  (  After cutting the stamped images out I blended the body form and stamps with a combination of Vintage Photo, Walnut Stain and Salty Ocean DI's) I like to ensure that there are no white edges on my projects and always edge with ink or a marker, charcoal pencil as it gives a better finish.

I used a Spellbinders die, edged with DI in Vintage photo and the  TH Sizzix Bigz die, ( Weathered Clock), which I blended with a combination of walnut stain and salty ocean.

The numbers were cut using  the TH Wordpad die from Sizzix.


The winged Steampunk  bodice, butterfly and bee are all raised off the paper to give a lovely  effect.

Certainly a sentimental keepsake that my niece will treasure. 

Its been some time since I played along with Fashionable Stamping Challenges but this make meets the current fortnightly challenge of 'Sentimental'. You can play along by clicking HERE

At Simon Says Stamp and Show the challenge this week is Colour. Please click HERE to play along with me :0

Thank you so much for visiting and for leaving comments.  I love to read them  and be assured that they are really appreciated.  Catch up later this evening  and definitely over the weekend when I will have time to play.....Yippee

Crafty Hugs


post signature

Sunday, 10 March 2013

Time Travellers

Hi everyone................ and a warm welcome to you all, especially my new followers. Today in the UK is Mother's Day, so I hope that all of you had a great day full of joy and  for some a day full of wonderful memories.

Some of you may have seen the start of this project on Wednesday when I joined in What's on Your Work Desk Wednesday ( WOYWW)  over at Julia Dunnit's blog, Stamping Ground. (see pic number 2 )

As I said I was not sure where I was going with this piece and even today I decided to add the chain, which is why I did not post yesterday as planned. 

You will see below that I took  my Creative Expression's timepiece mask and blended Distress Inks, namely vintage photo, using my paper masks as required, keeping the main stamped images to the forefront. 


Glossy Accents was adhered over the timepiece watch-face and Tim Holtz new pocket watch die-cut was given the rusting technique. Using acrylic wax and  rusting powder from Crafty Notions. You then spray white vinegar to start the rusting process.


You will see that I used the masking technique, cutting out the Time Travellers on paper so that I could cover them when I was stamping .

Here is a close up of the pocket watch die once rusted. Some Ideaology gears were added to give further dimension.


Below you can see the glossy accents on the watch face....................again giving depth to the project


I then adhered this A4 card, which was distressed on the edges and blended with Stormy Sky, to some cardboard. The cardboard was aged with Distress inks in Vintage photo and stormy sky before adding some chain that I purchased in a hardware store. 
The Time Travellers and Gear stamps in the centre, which are from Tim Holtz Stampers Anonymous Range 2013, were painted with some Distress Inks that I put directly on to my craft mat and applied using  a Ranger  water brush.
Some further ideaology gears were added before I was finished.

I would like to enter this piece in the following challenges:

Over at The Sunday Stampers the challenge is Use Some new Stash, which these stamps and the pocket-watch die  certainly are.

Craft Us Crazy are having an Anything Goes challenge theme and Anything Goes Challenge is Make it Manly.
Try it on Tuesday's Challenge is Time Flies, which it does for the Time Travellers !! 


Catch up soon...Crafty Hugs as Always x


post signature

Sunday, 20 January 2013

Tim's 12 Tags of 2013- January !

Hi Everyone......so good to have you drop in.  Having only started blogging last March I missed out on completing Tim's tags of 2012. I also missed out on meeting deadlines of others due to holidays, however, this year, I am going  participate and  make the complete set. : )

Tim posts his tag of the month on his blog  HERE, if you would like to play along.

Out of respect for Tim I will only discuss  the recipe where I have used an alternative technique or improvised to create January's tag.

On the tag below I used Tim's Scribble Stain Distress technique on the tag, which you can find on page 34  of Tim's first book, Compendium of Curiosities.

Prior to embossing,  I used Peacock Feathers and Antique Linen DI's with Vintage Photo Distress Ink.

 I then blended some DI's ( Vintage Photo and Stormy Sky)  over the top to make the raised areas pop !

This is the first time I have used this SSD technique and I so love the outcome/colours.............. Don't you just hate having to cover some backgrounds ??


Below is the finished Tag.
I used Tim's rubber stamp on acetate to create the film strip and as I did not have any ribbon reel or  the vial labels.  I just used  one of  Tim's stamp's from  another collection, distressing the edge with the paper distresser and blending with Vintage Photo DI


I so love this tag as I particularly like this  grungy style.


Tim's sentiment below is so true......sometimes it's just to easy to remain in the same routine and we need a goal, challenge or dream to focus on. 


Isn't that blue/green of the Peacock Feathers DI just stunning !!


Here is my tag on another background as I could not quite make my mind up as to which background I preferred. 


As I did not have the stamp or Distress Stain that Tim used for the ribbon, I applied  another of his stamps, 
(TH Collection - Captured Moments - CMS 037) on card as  demonstrated,  then,  I applied Weathered Wood  DI on to my craft sheet and spritzed it with water, smooshing my ribbon in it. I did this a few times, drying it in between until  I was satisfied with the outcome. The ribbon was crinkly so I just ironed it to straighten it, enabling the stamping to be seen.


Thank you  for visiting and I look forward to catching up with you all soon. 

If you leave a compliment to let me know of your visit I will always try and get back to you,  it's always nice to see what you have been creating too as we all inspire one another.

Crafty Hugs

post signature

Sunday, 14 October 2012

Autumnal Shades with Steampunk and Metal Twist

Welcome to followers old and new. I really do appreciate your visits to my blog and the inspiration that I find when I return the compliment. Today I was in a Steampunk mood and having viewed Anita Houston's Saturday  StepXStep on faux enamelling I decided to give it a try, using it as a background piece. You can find the technique here.

I used rusty hinge and walnut stain DI's over Tim's riveted embossing folder.


Over at Frilly and Funkie's blog the challenge is 'A Different kind of Tag'. Here I have made a  Steampunk Workmens Time Book using  two tag's.  I used  Oxford Impressions 'Steampunk Works'  for all images in this project. 


Once I completed the book I then took Tim's distressing tool and tore the edges of the book, which I distressed in Vintage Photo DI. ( OOps....forgot to take a photo of finished book, however,  you can view it in the last photograph)


Isn't this Oxford Impressions clockwork bird so cute :) I just had to give him a hat with a rusty top. His wing is a bit rusty too.

You can also see some  stamped cogs in the corner, which were stamped in Archival Ink


The words are also from the OI STamp Set and after stamping I heat embossed them, adding more texture.

The addition of some of Tim's Idea-ology pieces and a metal watch, coupled with some rusting completed the look. As always please let me know you have visited and I will do my best to return the compliment.

I plan to enter this piece in the following challenges :


post signature

Thursday, 19 July 2012

Steampunk Mix

Hi Everyone..........a huge 'Thank You' to followers old and new. Its lovely to read comments you leave and inspires me when I return the compliment and view your own fabulous creations.

Below is a card that I made for my Dad's recent birthday. First of all I stamped the card using Stampers Anonymous TH Mixed Media stamps, which I love. I then blended the card with various brown DI's. The pocket to hold the tag was  die cut from Spellbinders Donna Salazar's Creative Book Pages 2, which was blended with more brown DI's and edged with Rusty Hinge. Having found Tim Holtz Distressables Book I cut out the letter D from one of the Distressable Papers, adhering it to cardboard. Once dry I blended it with DI's then covered in embossing ink/clear embossing powder. ( I  clear embossed as I did not have any of the memory glass that Tim uses in the book )  On the front page I used two of Wendy Vecchi's stamps from the European Art range using the masking technique.   I also used the masking technique on the last page you can see, using various stamps from Sam Poole of Creative Studio's Vintage Inventor Set.

The tag was stamped and blended with DI's too and an Idea-ology tag attached. The envelope was made from  some Basic Grey papers  I have in my stash.

I am entering this card in the following challenges:


Thank you for dropping in......hope to see you again soon.

Crafty Hugs

Annie x


Monday, 16 July 2012

Clockwork Birds

Hi Everyone.............sharing a piece that I created for my DH's birthday. I just love the stamped images from Paper Artsy.

To make this piece I used recycled cardboard, covering it with multi- medium before covering with recycled book pages, which were blended with distress inks. Taking a piece of Metal foil, adhered to card stock, I ran it through a TH embossing folder on my Bigshot. I then covered the embossed foil in Denim and gold paint dabbers, sanding the metal foil once paint dried. The clock work birds were stamped on ultra smooth white card, cut out and then inked with distress inks and some gold paint  from the dabber was added to the crowns. The sentiment was also blended with distress inks.  a variety of metal charms/cogs were used and were altered with paint then wiped with a dry cloth. The metal tag was adhered with sticky pads and string attached. I used sticky pads to raise the metal background, birds and main sentiment, adding dimension. 

Wire was then twisted and placed through piercings, enabling this piece to be hung on a wall.

I am entering this piece in the following challenges:

Sir Stampalot Challenge - Whats Your Crafty Passion ( my passion is Distress, Vintage and Steampunk )

Many thanks to followers old and new for continuing to visit and leave comments. 

Crafty hugs

Annie x