Showing posts with label distressed. Show all posts

Monday, 27 January 2014

Nostalgia

So lovely of you to join me here at Curious N CRafty Treasures this evening. It was so nice to have a bit of playtime over the last few days as real life was pretty hectic and I just had to fit in some crafting  time.....I am sure you will understand.
As a huge fan of Robert Burns or 'Rabbie' as we say here in Scotland, DH and I attended a Night of Burns at  The Hydro in Glasgow on Saturday.  One of my favourite Scottish Folk Artists was there, Dougie McLean ( another good Scottish name) as well as two of my favourite bands, Capercaillie and Salsa Celtica ( they play Scottish Music with a latin twist, quite unique) Then yesterday we had a wee Burns Supper at home, with haggis, neeps and champit tatties. Of course there was a traditional nip of whisky, accompanied by recital of  several of the Bards poems and  various attempts at singing!!  All good fun!!

Over at Fashionable Stamping Challenge Blog this fortnight the theme is 'Tag Along' and I just had to play along so away we go with a few photographs of my FSC entry and some explanation of the recipe x
I  used a size 12 tag and started off with some Paper Artsy ( PA) paint in Ice Blue, followed by PA Crackle Glaze. Once dry I painted once again with PA paint in Haystack and watched the cracks appear :-) gorgeous !! 
 
Some old book pages were then adhered with Inkssenials Glue n Seal

I then took a size 10 tag and stamped the Dark Room Door Henry & Harriet collage using WV's Archival ink in Potting Soil, tearing off the bottom of the tag. The image is so nostalgic for me right now as I have been browsing over many old photographs, which I hope to add to a journal........some day !!!
  I added  charcoal to the papers, which I rubbed with my finger, adding some depth and definition to the torn edges and used the Crafters Workshop stencil 'Art Is'
 Distres Inks were used on all of the elements below and on the size 10 tag I spritzed n flicked water. The size 5 tag had some book papers adhered and the sentiment from Dark Room Door Lovely Ladies was added. The pocket watch is also from Dark Room Door. I previously mentioned my love of Tim Holtz Dot Fade stencil and of course it found its way on to this make !!

Once I had decided on the layout I adhered some vintage lace and some Idea-ology charms

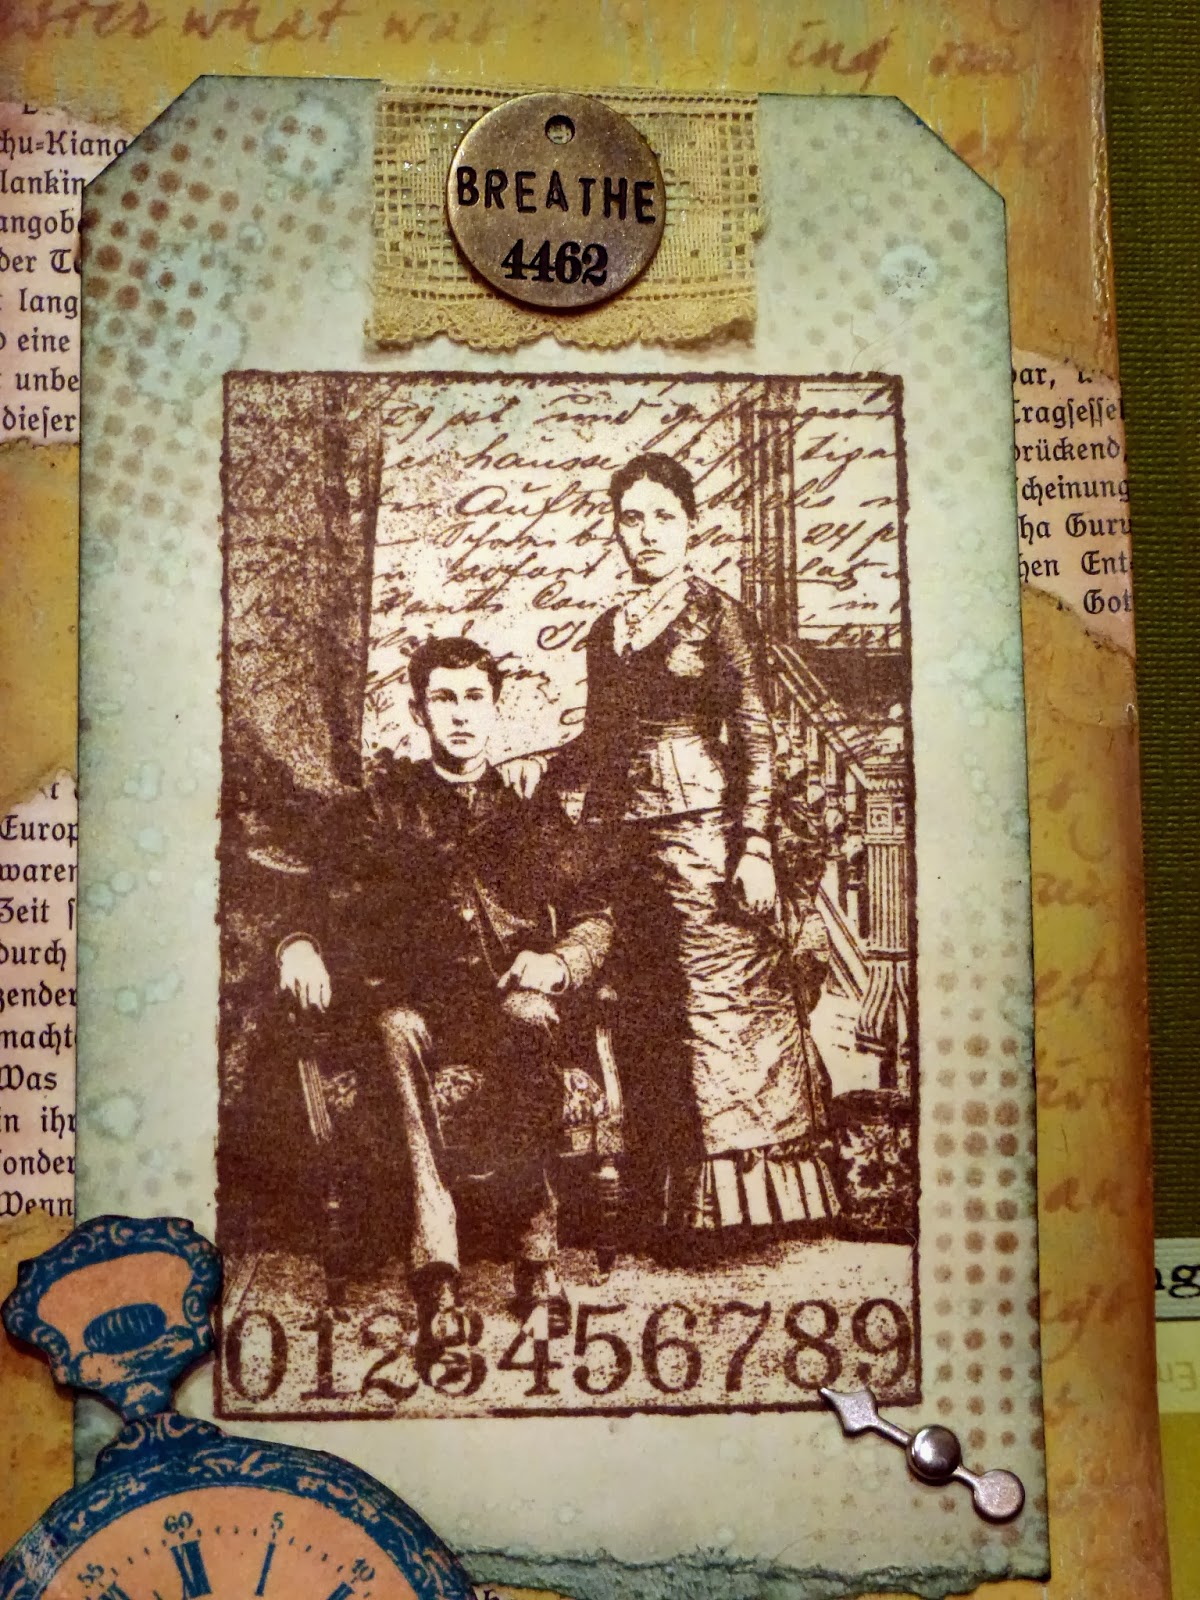
To finish I added some vintage ribbon and twine

Well thats it for now and I thank you for staying with me right to the end. :-)

Take care and have a great week

Crafty Hugs xx


post signature

Tuesday, 31 December 2013

Shiny Happy People.........and 'Bliadhna Mhathur'

Hello everyone sending my Best Wishes for 2014 to you all :-) and I hope that those of you who celebrated Christmas had  the most wonderful time. I really do apologise for my absence over the last few weeks, work has been so busy and I was crafting every night to make cards/gifts etc. 

To end this year and start the next year I am sharing my journal which was created at a Finnabair Workshop in Wirksworth, Derby at the end of November. It was a wonderful day of creativity.......extreme concentration for 9 hours.....but very worthwhile. Lots of fabulous techniques and amazing textures, which I love !!


Lots and Lots of wonderful layers of embellishments, most of which were provided in the kit and then you chose the layout and colours


The photographs are just random ones left over from when mum and I did the Finnabair Workshop at Damselfly in Glasgow.


I adore this style and hope you like it too. 

Well I am just finished work and off to get ready for 'The Bells' ringing out the Old Year and ringing in the New Year. Here in Scotland we call New Years Eve 'Hogmanay' or Ne'erday and I have posted some of the Traditional Greetings. It was also tradition to bring a piece of coal as a gift, particularly if you are the 'first foot' ( first guest to arrive at someone's house, usually a neighbour, after The Bells)

          Lang may yer lum reek (wi' ither folks' coal!)
Long may your chimney smoke (with other people's coal!) 

A guid New Year and mony may ye see.
Happy New Year, and many more may you see. 

May the best ye hae ivver seen be the warst ye'll ivver see.
May the best you've ever seen be the worst you'll ever see. 

And, if you're feeling really brave, go Gaelic: 

Slàinte mhath! (pronounced SLAN-jay vah)
Good health! 

Note: Slàinte mhath is a traditional Scots phrase you can use all year round when drinking (especially whisky) to say 'Cheers'. You can reply either with the full Slàinte mhath or just Slàinte.

Bliadhna mhathùr! (pronounced BLEEne vah OOHR)
Happy New Year! 


"Thank You" to everyone of my followers and visitors. I truly appreciate your visits and comments and wish all of you very warm wishes in 2014 from the bottom of my heart x

 Take Care and Crafty Hugs. See you in the New Year xxx


post signature

Tuesday, 29 October 2013

Stencils/Masks at Craft Room Challenge

Happy Tuesday everyone.......a warm welcome to new  and old followers.  Today I am sharing a sneak peek of my first project as a DT member at Craft Room Challenge. I can't tell you how thrilled I am :-)


This fortnight Esther is the challenge host and our sponsor is Stamp Addicts. The lucky challenge winner will receive a gift voucher from Stamp Addicts to spend in their store.  

You can view the whole project  over at Craft Room Challenge Blog by clicking HERE. 

You will also be able to view the other inspiring makes of my DT Roomies.

I shall post the 'How to'  and recipe for this project later this week.

Take care and thank you for visiting.

Crafty Hugs xx


post signature

Sunday, 25 August 2013

Whimsical Canvas Make

Hi dear crafty friends. I hope you have had a lovely weekend whatever you have been up to :-)

The weather this weekend has been lovely, which was quite important in relation to a local Marymass Festival. This is an annual event which started in the 12th Century in relation to  the Christian Feast of Assumption, ( Mary's ascent to heaven)  Since the 15th Century, following  a visit to the Town by  Mary Queen of Scots,  who spent the night at Seagate Castle in Irvine, accompanied by her four Mary's. Local  girls, who have the town's postcode are elected by their peers  to take on these roles and the coronation takes place at midday, in front of the Town's House. There is a lot of work goes in to organising the festival, which lasts 12 days, so its always a bonus if the weather is at least dry.

DH and I went along to the coronation and watched the Parade, which was quite amazing this year. Its also nice to catch up with some old acquaintances too, who like us, made the effort to attend.

Today I finally finished a canvas mixed media project that I started a couple of weeks ago when Rita ( my mammy)  and I met up with our crafty friend Astrid, of  Astrid's Artistic Efforts blog. 

Whilst i have dabbled in this crafting style previously I was not too sure of some aspects so it was great to have Astrid on hand to provide advice and guidance during the making. I did not finish it off until now  as I knew I wanted to add some stamping and other embellishments but was not sure where I was going.


Hope you like it..........there are some things that I wish I had done better but hey..........that's how we learn. 

Enjoy the rest of your Sunday and have a fab week.

I would like to enter this make at Our Creative Corner Challenge - Words Words Words as well as 


Crafty Hugs xxx
post signature

Sunday, 23 June 2013

Dare to Dream

Good morning everyone.......................weather not very nice her at present.....I do hope that the sunshine returns soon. Almost need to put the heating on as its a bit cooler this morning. 

Today I am sharing a wall hanging that I made for my sister's  recent birthday :-)


Just a quick post as I have several things to do today. The recipe was more or less the same as the previous make. I used a paper distresser to age the edges on the corrugated card. On the cardboard I used my TH scissors to distress the edges. I also used gilding wax on the corrugated card.

I am entering this make at the following challenges:


'THank You' so much for popping in and if you have time please leave a comment. I can then return the compliment by visiting your blog. 

Crafty Hugs and have a lovely Sunday xx
post signature

Saturday, 16 March 2013

My Take on Tim's March Tag of 2013

Hello Everyone ...... I  so love the weekend as I can spend longer in my craft room and get all inky.....which I have certainly done today!!!

 I have a few projects  that are ready to complete and here is my take on Tim's March Tag of 2013. If you would like to join in you can find Tim's recipe for his March Tag HERE

I had some of Tim's ingredients  but not all of them..............so I  had a good look at my stash to see what I could create my tag with :-)

You can see the finished tag below...then I have provided photographs of what I did when improvising. 


Below is a picture of some items that I used. 


I followed Tim's recipe but as I did not have the background paper I used a substitute from  Tim Holtz 'Crowded Attic' Paper Stash.

I had the tinsel but as I did not have the rabbit die cut I adhered the ranger wonder tape at the bottom of my tag, imagining it to be the grass.........isn't imagination such a wonderful thing ......................now I am creating x


  Tinsel now adhered, as seen below, and given the treatment as in Tim's recipe


I decided that although I had the styled labels die I would use Tim Holtz New Sizzix Oval die, as I  imagined it as an Easter egg on my tag !!!  I  embossed it first  and then inked it with Salty Ocean Distress Ink, highlighting areas with gilding wax in blue and gold, then it was edged in Vintage Photo.  ( I don't know the name of the die but it is a Sizzix one.....sorry )


I placed the Sizzix Picket Fence die cut over the grass, blending Gathered Twigs DI and the gilding wax. 
( it was also adhered with Ranger Wonder Tape)

I must have used  all of my ideaology foliage so took some florals from Sizzix Tattered Flower Garland die and painted them with Tim Holtz Distress paint in Rusty Hinge and Chipped Sapphire. I placed some Ranger Stickles in 'Icicle' on the flowers, blending them in with that area of my tag, which was lovely and sparkly.


As it's March and I did not have a rabbit stamp  I used the Hare stamp from 
Stampers Anonymous Spring Sprung set ( CMS084).
He was coloured with a water brush dipped in DI placed on my craft sheet. I used an antique linen and vintage photo mix for the hare's body and a few layers of Salty Ocean DI on his jacket. I dried each layer before adding another to create depth of colour.
The cravat is  painted with a mix of DI Fired Brick and a Barn Door Distress Marker


The vintage Ribbon was smooshed in Salty Ocean DI, which was  well spritzed  with water on my craft mat, then heat dried.


I am off now to link my tag on Tim Holtz blog,  once again you can find it HERE

Have a fabulous weekend and I look forward to  catching up with you all.

Crafty Hugs
post signature

Saturday, 23 February 2013

My Take on Tim's Tag February 2013

Good Evening everyone.................and a warm welcome to new followers :-)

This year I have decided that I am going to participate in all of Tim Holtz Tags of 2013 and below you will find my take on Tim's February Tag. I improvised on quite a few items as I did not have everything that Tim used. Its all about enjoyment and participation so here's the recipe I used.  If you would like to participate and find out how Tim created and inspired us this February click HERE


I did not have the Distress Stains that Tim used but I did have the Distress Inks, so I inked up my craft sheet with the Distress inks in the same colours and spritzed with water, smooshing my tag through several times until I was satisfied with colours.  If you have not done this before remember to dry each layer with your heat tool !


You can see the results below. I then followed Tim's tut for edging/distressing and inking my tag


As I did not have the Queen of Hearts blueprint stamp I decided to triple emboss one of my favourite stamps from Tim's Stampers Anonymous Classics SCF 007.

First I took black card stock and added clear embossing ink then Ranger  ultra thick embossing enamel. I did this several times before adding a few drops of various Ranger Perfect Pearls Powders.


I then inked the stamp up in  permanent Red Archival Ink and stamped in to the very hot enamel.

I was not happy with the result so took my heat tool and melted it again. You can see how the enamel melted but the image remained. 


I then added gold ink to the stamp and placed it in to the warm enamel once more.

I was still not happy and melted it again with my heat gun..............however, I absolutely love the look of my happy accident so decided to keep it for another project.... !!!!


I started again as before but this times used black archival ink  on the stamp and you can see that the outcome  of my triple embossing was what I hoped for :-). I cut around the stamped image and left it to the side to adhere later.


As I did not have the embossing folder Tim used I took some die cut letters from Tim's Sizzix Word Typepad die, placing them on a piece of card, which I covered them with Inkessentials metal foil.

I took my brayer, rolling it back and forth. I then took a ball tool and went around the edges of the letters, making them stand out even more.


I painted the piece with black soot and then sanded it to distress it.
Attaching it with some staples. 


I did not have a custom cash key so I inked the same stamp on some shrink plastic, colouring it with alcohol ink.

I have not used shrink plastic for a long time and forgot how fun it is to work with.


You can see the small embellishment below......................isn't it cool !!

I do have tissue tape and whilst I love  the way Tim has used it  I wanted to use some rag ribbon that was a gift from my very talented blog friend Anita, whom you all know as The Artful Maven Haven. 

I placed some Fired brick DI on my craft sheet  and spritzed with water, scrunching the ribbon around until satisfied with colour. I dried the ribbon with my heat tool and then decided to stamp the word love, using  Archival permanent waterproof ink.  


Anita also sent me some moustache gems, which I placed above the O, its kinda like an offset hairpiece!!!


The embossed image was adhered with silicone as I wanted it to be raised slightly off the tag.

A little chit chat sticker covered the word Patisserie that is on the stamp.


So thats my finished Tag. 
Now I wonder what have you been up to?

Whatever it is I hope you are enjoying the weekend. If you drop by please leave a comment and I shall get back to you as soon as I can. 

Take Care and Crafty Hugs
post signature

Wednesday, 20 February 2013

Brushless Water Colour and Distress Ink Background

Hi Everyone....Thanks for dropping by your visits are so appreciated. For those of you who read my previous post you will know that last weekend I planned to craft but had lost my mojo.....was feeling tired.
I decided to watch crafty DVD's by none other than Tim Holtz. It had been some time since I viewed them and I remember purchasing them way back in 2005 and loving the outcome of the  Distress embossing powders and Distress Inks. 

Below you will see a piece that I made to send to my crafty friend Buttons, using some of Tim's techniques that I had not used in some time.


I created the background below using Tim's techniques. You can see the water droplets on the top of the card. As I did not have a craft iron I used a small travel iron, purchased many years ago and never used !!!


                                       Once  dried  I blended some vintage photo Distress ink and matted on to some card

          Below you can see the brushless watercolour images, the lighter being second generation.  (I used various Adirondack Inks on the stamp)


I then die cut Tim's new Sizzix Washer Border, inking it with Peacock Feathers DI and a smidgeon of Vintage Photo DI on the edges. 


The brushless watercolour image from Tim's Stampers Anonymous Classics ( SCF001) was torn around the edges then inked with a combination of Peacock Feathers and Salty Ocean DI's


To complete the look I matted the stamped image on to blue card, distress with Tonic Studios Paper Distresser and inked with Salty Ocean DI.
I added some twine and a die cut butterfly, which I had rusted earlier, then some chipboard letter, painted with Tim's new Distress Paints. I then rubbed some area of the project, including the letters with Treasure Gold wax in White Fire and Sapphire.


Over at Frilly and Funkie Challenge Blog the theme is 'Layer it on and Share a Word'., which this piece meets. 
I am also entering the 'Anything Goes'  over at Through The Craft Room Door challenge blog.


Take care and catch up soon. Be sure and leave a comment and I will get back to you.

Crafty Hugs
post signature